Before start to automate your API project, You need a Base URL to test. In this example, We will use Reqres, hosted REST-API ready to respond to your AJAX requests.
Let’s start !
1- Create a new API automate project
Click PROJECTS and select API tab
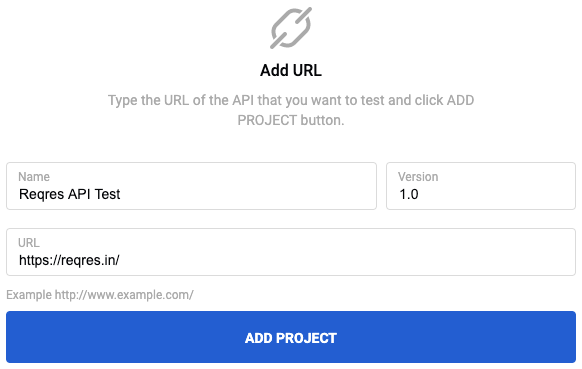
Click ADD URL button

Write App Name, Version, base URL of the API and click ADD PROJECT button
URL will be your baseURL and must start with http:// or https://
2- Develop your test cases
You will be navigated CASE MANAGEMENT automatically
Click ADD SECTION and write your SECTION name
Press ENTER to Save your Section
Click ADD CASE button
Write your TestCase Name and press ENTER
Select Java language and Rest Assured framework.
Click ADD STEP button
Write your Step Title and Press ENTER
Click Edit button on Step and copy-paste the needed step code(s) (Rest Assured Automation Script)
Click SAVE SCRIPT button
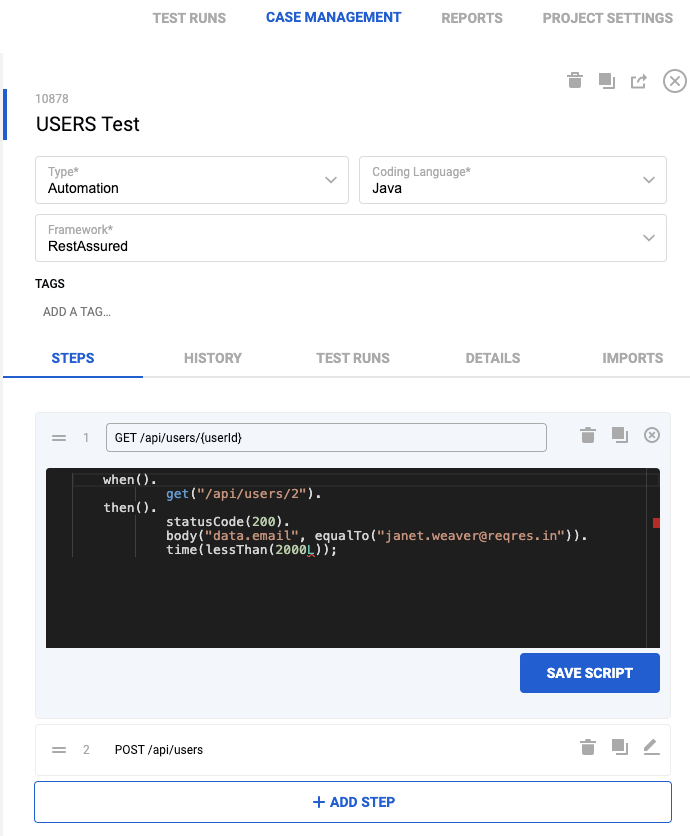
Example-1 GET Single User Request https://reqres.in/api/users/2
Response:
{
    "data": {
        "id": 2,
        "email": "janet.weaver@reqres.in",
        "first_name": "Janet",
        "last_name": "Weaver",
        "avatar": "https://s3.amazonaws.com/uifaces/faces/twitter/josephstein/128.jpg"
    },
    "ad": {
        "company": "StatusCode Weekly",
        "url": "http://statuscode.org/",
        "text": "A weekly newsletter focusing on software development, infrastructure, the server, performance, and the stack end of things."
    }
}
Automation Script:
    when().
            get("/api/users/2").
    then().
            statusCode(200).
            body("data.email", equalTo("janet.weaver@reqres.in")).
            time(lessThan(2000L));
Example-2 POST Create User Request. https://reqres.in/api/users
Request Post Data:
{
    "name": "morpheus",
    "job": "leader"
}
Response:
{
    "name": "morpheus",
    "job": "leader",
    "id": "610",
    "createdAt": "2020-07-01T09:15:46.358Z"
}
Automation Script:
String postData = "{\n" +
        "  \"name\": \"morpheus\",\n" +
        "  \"job\": \"leader\"\n" +
        "}";
given().
        contentType(ContentType.JSON).
        body(postData).
when().
        post("/api/users").
        then().
        statusCode(201).
        body("name", equalTo("morpheus"));
For more advanced use cases, you can read Rest Assured usage documentation: https://github.com/rest-assured/rest-assured/wiki/Usage
3- Run a test and check the results
Click TEST RUNS tab to create a new Test Run
Click CREATE NEW TEST button to create a new Test Run
Set Your Test Name
Check your TestCase(s) which will run
Click SET TIME button
Click SELECT DEVICE button
Seldct API-Bot which will run your TestCases
Click RUN TEST button
After a few seconds, your test will start automatically. You can inspect the TestRun when the test goes RUNNING status
Click VIEW RESULTS button
You should see your TestCases with Steps and Overall status of your test
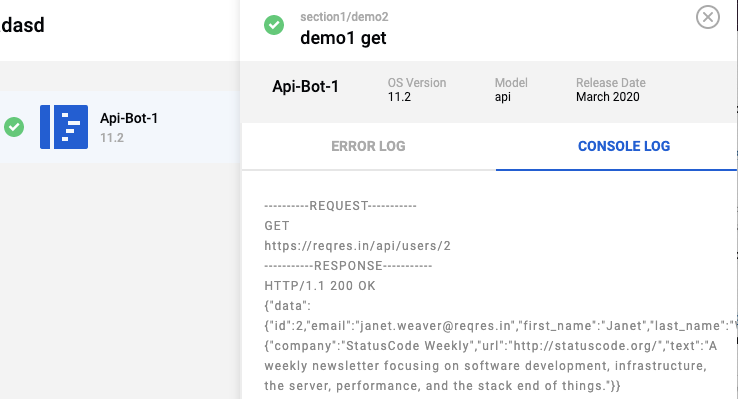
Click on any STEP name to inspect
Select API-Bot from the list
Review the Test Results (Request & Response Details, Console Logs, Error Logs..)